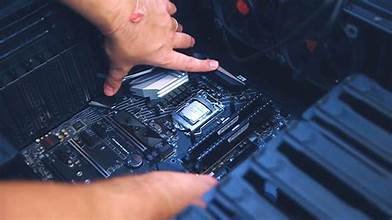
Building a custom PC in 2024 can be a rewarding experience, allowing you to tailor your system to your specific needs and preferences. Following these processes helps you make a PC.
- Define Your Purpose
Gaming: High-performance graphics card and processor.
Content Creation: High RAM, storage capacity, and powerful CPU and GPU.
General Use: Balanced specs for everyday tasks. - Choose Your Components
You’ll need to select the following components:
CPU (Processor): Choose based on performance needs (e.g., AMD Ryzen or Intel Core).
GPU (Graphics Card): Essential for gaming and graphic-intensive tasks.
Motherboard: Ensure compatibility with your CPU and has enough ports and features for your needs (e.g., ATX, microATX).
RAM (Memory): 16GB is typically a good starting point; consider 32GB for gaming and content creation.
Storage:
SSD (Solid State Drive): Fast loading times (NVMe SSDs are preferable).
HDD (Hard Disk Drive): Larger storage capacity for files (optional).
Power Supply (PSU): Ensure it provides enough wattage for your components; look for 80 Plus certification for efficiency.
Case: Choose one that fits your motherboard size and has good airflow.
Cooling Solution: Depending on your CPU, you may need an aftermarket cooler (air or liquid cooling).
Operating System: Windows, Linux, or other OS options.
Purchase Your Components
1. Compare prices from various retailers (online and local).
2. Consider buying during sales or looking for bundles to save money.
Gather Your Tools
1. Phillips-head screwdriver.
2. Anti-static wrist strap (optional but recommended). Cable ties for the organization. A clean, spaciousworkspace.
Build the PC
Prepare the Case: Remove the side panels and any pre-installed components.
Install the Power Supply: Place it in the designated area and screw it in.
Install the CPU: Open the motherboard’s socket, align the CPU correctly, and lock it in place.
Install RAM: Insert the RAM sticks into slots in the motherboard.
Install the Motherboard: Place it into the case and screw it down to standoffs.
Install the GPU: Insert it into the appropriate PCIe slot and secure it with screws.
Install Storage Devices: Mount SSDs or HDDs and connect them to the motherboard and power supply.
Connect Cables: Attach all necessary cables, including power, SATA, and front panel connectors.
Cooling Solution: Install your CPU cooler and case fans as needed.
First Boot and BIOS Setup
1. Power on your PC. If everything is connected correctly, we should see the BIOS screen on the computer.
2. Update the BIOS if necessary and configure settings like boot order and XMP profiles for RAM.
Install the Operating System
1. Use a bootable USB drive or installation disc to install your chosen OS.
2. Follow on-screen prompts to complete the installation.
Install Drivers and Software
Install the necessary drivers for your GPU, motherboard, and peripherals.
Install any additional software you need (games, productivity tools, etc.).
Cable Management
Organize and tidy up cables to improve airflow and aesthetics.
Final Check and Enjoy
1. Ensure everything is running smoothly and monitor temperatures.
2. Enjoy your new custom-built PC!
Tips
Research Each Component: Check reviews and compatibility before purchasing.
Watch Tutorials: There are plenty of video guides available if you’re a visual learner.
Ask for Help: Don’t hesitate to reach out to forums or friends if you encounter issues.
By following these steps, you’ll have a custom PC built to your specifications in no time!
